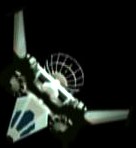
Some probably already figured this out, but for the rest of us, ( especially Blender's Cycles Users ) I want to share an important discovery:
A way of Actually getting shadows and highlights in the Cycles renderer.
The Concept is simple, reduce the "exposure time", and Increase the Lighting Strength. Exposure time of about one tenth or two tenths of normal, coupled with a lightsource strength of 20 times normal is pretty good. This does not fix some of the blurring though, so for small ships you'd want to turn off the AA.
More In Depth:
Exposure time can be modified through the Render properties( Camera Icon ) of the properties editor, which is by default on the far right of the window. It's located underneath "Film" and is normally set to 1.00.
Lighting strength is modified through the properties editor too,( Gasp ) though you have to pick "Use Nodes" to access the strength variable, which is normally set to 100.000 if a point light. Since a "Sun" Lightsource is what you probably should use, you should know that a Sun is normally set to 1.000. That seems a big difference, But I Dunno.
Take Note that adjusting the size of the lightsource is way, way, different from adjusting it's strength, and will most likely make the image less contrasted than you want.
AA For Noobs: Means Anti-Aliasing, and will make small ships look like puddles of pudding if not removed( Makes Big ships look nice, though ). To Modify, Consult the Properties Editor Again: Uncheck "Progressive" Under the "Sampling" area, and the AA sliders are right there, By default set to 4 Passes. Please Take Note: It seems that any value between 0 and 3 just makes it look jagged. So, It's all or nothing in terms of Anti-Aliasing.