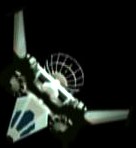

- HUDs as they appear in 1.3b2
- brokenHUD.gif (14.6 KiB) Viewed 3494 times
Code: Select all
		<Armor>
			<ArmorSection start="330" span="60" armorID="&itHeavyTitaniumPlate;" />
			<ArmorSection start="30" span="60" armorID="&itHeavyTitaniumPlate;" />
			<ArmorSection start="270"  span="60" armorID="&itHeavyTitaniumPlate;" />
			<ArmorSection start="210"  span="60" armorID="&itHeavyTitaniumPlate;" />
			<ArmorSection start="90" span="60" armorID="&itHeavyTitaniumPlate;" />
			<ArmorSection start="150" span="60" armorID="&itHeavyTitaniumPlate;" />
		</Armor>

			<ArmorDisplay>
				<ArmorSection name="forward"
						imageID="&rsMonsoonArmor;"
						imageX="49" imageY="0" imageWidth="49" imageHeight="50"
						destX="43" destY="18" hpX="55" hpY="13"
						nameY="0" nameBreakWidth="360" nameDestX="0" nameDestY="0" />

				<ArmorSection name="forward-starboard"
						imageID="&rsMonsoonArmor;"
						imageX="123" imageY="0" imageWidth="25" imageHeight="50"
						destX="92" destY="18" hpX="95" hpY="45"
						nameY="22" nameBreakWidth="275" nameDestX="0" nameDestY="0" />

				<ArmorSection name="forward-port"
						imageID="&rsMonsoonArmor;"
						imageX="172" imageY="0" imageWidth="24" imageHeight="50"
						destX="19" destY="18" hpX="15" hpY="42"
						nameY="44" nameBreakWidth="200" nameDestX="0" nameDestY="0" />

				<ArmorSection name="aft-starboard"
						imageID="&rsMonsoonArmor;"
						imageX="98" imageY="0" imageWidth="25" imageHeight="50"
						destX="92" destY="68" hpX="95" hpY="78"
						nameY="66" nameBreakWidth="200" nameDestX="0" nameDestY="0" />

				<ArmorSection name="aft-port"
						imageID="&rsMonsoonArmor;"
						imageX="148" imageY="0" imageWidth="24" imageHeight="50"
						destX="19" destY="68" hpX="15" hpY="78"
						nameY="88" nameBreakWidth="200" nameDestX="-0" nameDestY="14" />

				<ArmorSection name="aft"
						imageID="&rsMonsoonArmor;"
						imageX="0" imageY="0" imageWidth="49" imageHeight="50"
						destX="43" destY="68" hpX="55" hpY="110"
						nameY="110" nameBreakWidth="200" nameDestX="0" nameDestY="0" />
			</ArmorDisplay>
Code: Select all
		<Armor>
			<ArmorSection start="0" span="50" armorID="&itHeavyTitaniumPlate;" areaSet="0,2" />
			<ArmorSection start="310" span="50" armorID="&itHeavyTitaniumPlate;" areaSet="1,6" />
			<ArmorSection start="50" span="70" armorID="&itReinforcedTitanium1;" areaSet="0,2" />
			<ArmorSection start="240"  span="70" armorID="&itReinforcedTitanium1;" areaSet="7,13" />
			<ArmorSection start="130" span="120" armorID="&itHeavyTitaniumPlate;" areaSet="3,4" />
		</Armor>

			<ArmorDisplay>
				<ArmorSection name="fwd-stbd"
						imageID="&rsTyphoonArmor;"
						imageX="27" imageY="0" imageWidth="26" imageHeight="15"
						destX="68" destY="14" hpX="81" hpY="13"
						nameY="0" nameBreakWidth="200" nameDestX="0" nameDestY="10" />

				<ArmorSection name="fwd-port"
						imageID="&rsTyphoonArmor;"
						imageX="0" imageY="0" imageWidth="26" imageHeight="15"
						destX="42" destY="14" hpX="29" hpY="13"
						nameY="22" nameBreakWidth="200" nameDestX="0" nameDestY="10" />

				<ArmorSection name="starboard"
						imageID="&rsTyphoonArmor;"
						imageX="75" imageY="0" imageWidth="23" imageHeight="69"
						destX="101" destY="34" hpX="100" hpY="60"
						nameY="44" nameBreakWidth="360" nameDestX="12" nameDestY="0" />

				<ArmorSection name="port"
						imageID="&rsTyphoonArmor;"
						imageX="52" imageY="0" imageWidth="23" imageHeight="69"
						destX="14" destY="34" hpX="10" hpY="60"
						nameY="66" nameBreakWidth="200" nameDestX="0" nameDestY="8" />

				<ArmorSection name="aft"
						imageID="&rsTyphoonArmor;"
						imageX="0" imageY="75" imageWidth="52" imageHeight="16"
						destX="42" destY="108" hpX="55" hpY="110"
						nameY="88" nameBreakWidth="360" nameDestX="12" nameDestY="0" />
			</ArmorDisplay>
2 and 4 segment HUDs using the same format do still work.
